
LCC Summer Butterfly Project
We love monarch butterflies. We just adore them! Last summer our LCC kids got to observe and care for monarchs from caterpillars all the way to butterflies. Here is our story! We’ve also included simple directions and tips to hatch your own at home. We hope that you’ll share your experiences with us with stories and photos on our facebook, instagram, or send an email to Molly

Monarch caterpillars love milkweed! In fact it’s the only thing they eat! They munch their way through the leaves and grow and grow!

Here is the chrysalis stage. Notice in the first picture the chrysalis is a beautiful green. It has some little golden dots around the top. Eventually we could see a butterfly had formed inside. When the butterfly finally wiggled out it hung on the clear shell for a while to dry its damp wings.


Did you know you can tell if a monarch is a boy or a girl? Male monarchs have two dots on their hindwings. Female butterflies don’t have any dots on their hindwings. So cool!


Butterflies have sticky little feet. It felt like they were tickling us !Here are two of our monarchs getting ready to fly away. Eventually they did but I think we had taken such good care of them that they kind of wanted to stay with us!


Tips for raising monarch butterflies:
Here’s what you’ll need:
Milkweed (fresh sprigs daily)
Monarch caterpillar
Clear container
Small piece of screen
large rubber band (optional)


Once you’ve gathered your supplies the last thing to do is place the milkweed and caterpillar (or several caterpillars!) in the container. I like to cover the container with some screen and a rubber band . The caterpillar will nibble and nosh for about two weeks until it is fully grown. Then the caterpillar will search around the container and find the perfect spot to attach itself and form a chrysalis. 10-14 days and a lot of changes later a new and beautiful butterfly will emerge! After hanging and beating its wings for a few hours the butterfly is ready to fly. Bon Voyage little friend!

Recycled Bird Feeders
Create and hang your beautiful bird feeder made from materials you likely have in your home. What will come to your feeder? What kinds of birds live around your house? We'd love to see your creation and hear what shows up!

Here is what you’ll need:
Milk carton (found mine in our recycling!)
Paints
Paint brushes
Scissors
Hole punch (or something to poke a hole in the top)
String or ribbon

Step 1:
Cut out all four sides of your carton. Be sure to leave a base to hold your birdseed.

Step 2:
Paint your carton. I decided to do stripes and polka dots! Don’t paint the inside though. Just the outside will do.

Step 3:
Punch a hole in the center top of the carton…

Step 4:
And pull a string through! Fill the base with some bird feed and…

Hang your beautiful bird feeder outside!
I am anticipating Robins and Blue Jays coming to my feeder. Probably a squirrel or two as well. I wonder what will come to your feeder? What kinds of birds live around your house? I’d love to hear what shows up!
XO Sara Tall XO
Nature collages with play-dough!
All you need for this fun sensory activity is a batch of playdough and special found objects from outside!

First!
I whipped up a fresh batch of playdough (I used our fabulous LCC recipe!) I didn’t add any color or smell to this batch. I was just going for the basics. 100% plain and simple!

Then!
I grabbed some of my favorite natural loose parts. We have lots of Hemlock trees around our house. I love the little cones! I also cut some twirly grapevine! I dug into my rock stash too.
Let the creating begin! I love how the natural playdough looks and feels. The rocks, beach glass, stones, vines and Hemlock all blend so beautifully!


I also like to press the objects into the playdough. The grapevine makes tiny marks. The Hemlock looks kind of like a fossil to me.


I would love to see which natural objects you find and how you arrange them!
Will you color your playdough? Will you add a scent to it? I am excited to see what you do!
XO Sara Tall XO
Shadow Tracing
The sun has returned! Yay! This activity is a fun way to explore shapes and shadows. Using the sun to create a shadow, place chosen objects on paper and use a pencil to trace around the shadow. Afterwards you can color, paint, or decorate your drawing. We'd love to see your creations!

Materials Needed:
The Sun!
White paper
Pencil
Various plastic animals
Directions: Using the sun to create a shadow, place the animal(s) on the paper and use your pencil to trace around the shadow! Afterwards you can color, paint, or decorate your animal drawing!
*This can be modified to different ages of kids by using less complex items to trace around. Try using blocks, duplos, favorite action figures, dinosaurs, cars, diggers etc.
Homemade Butter - Some Scrumptious Science!
I love butter! It is one of the most delicious things I can think of. I do a lot of baking and I always use butter. But did you know that you can make your own butter at home? It’s true! And it’s science!

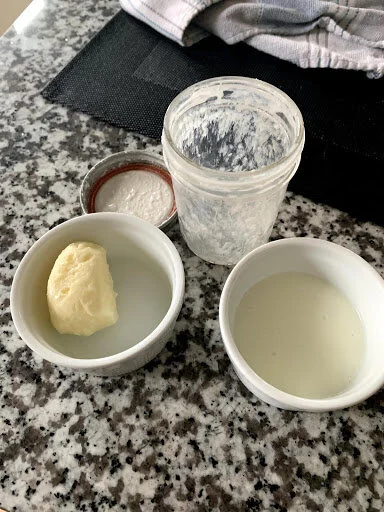
This experiment requires only two ingredients.
Yup! That’s it. Just two! You will need:
- Heavy whipping cream
- Glass Jar with a lid
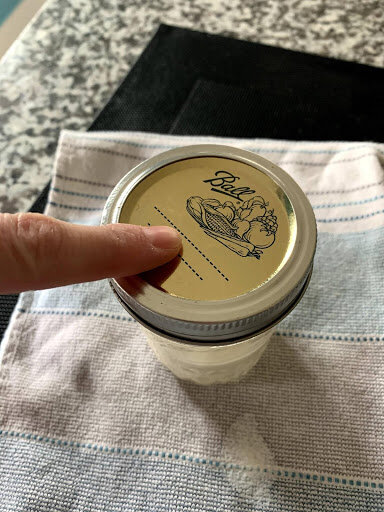
The first step is pouring the cream in the jar. Fill about half way full. Get your lid on nice and tight. Don’t forget or you will have MESS!


Now here’s where the fun and the science begin. Somehow the heavy cream has to turn into butter, right? But how? Should you ask it nicely? Give it a little smooch? NO! You have to shake it up! And shake and shake and shake and shake...


Magical things are beginning to happen!
The cream started out liquid and white. Take a couple peeks inside the jar as you shake. Do you see any changes happening? What about the sound in the jar? And what about the color?
After about 10 minutes of shaking you should notice a separation between the solid butter and the liquid left in the bottom. That liquid is called buttermilk. It’s really light and sweet. Give it a taste! Pour the butter milk off and put your fresh butter in a dish. That’s it. BUTTER!
I added a pinch of salt and some maple syrup to my butter. Other additions could include honey or brown sugar. Be adventurous! Sit back and nibble some toast topped with your scrumptious science!
Xoxo Sara Tall


DIY Light Table
The possibilities for playing and learning with a light table are endless! Kids are naturally drawn to the gentle glow of the light table and will stay there for long periods of time, which is great for stretching those budding attention spans. Cassie's video tutorial gives directions for a simple light table that can be made at home and offers a few ideas for activities that our kids at LCC have enjoyed.
Happy Earth Day from LCC
‘There is something infinitely healing in the repeated refrain of nature — the assurance that dawn comes after night, and spring after the winter.’~ Rachel Carson, A Sense of Wonder.
We love celebrating Earth Day with our kids at LCC and this is the time of year that we finally get to put away the snow pants and watch things come to life in our natural playscapes. We also like to include kids in clean up activities around our neighborhood, taking care of our little corner of the planet. While we won’t be together this year, we hope that you all get to find a way to appreciate and nurture your own little backyard habitats and celebrate Earth Day today.
The Children’s Nature Network has some great resources for kids and parents to stay connected to the natural world during COVID-19: https://www.findingnature.org/

Bubbles!
Here is a tried and true recipe for bubbles you can make at home

Step 1
Gather up your ingredients! You will need: ½ cup Dawn dish soap (or whatever you have on hand), ¼ cup light corn syrup, 3 cups water and bubble wands.

Step 2
Pour all three ingredients into a container and mix well

Step 3
Head outside and play! These bubbles will last quite a long time if covered. Have fun!!!

FYI
If you don’t have bubble wands at home, here is a link to ideas for making your own: Make your own bubble wand
Painting Fossils with Water
LCC teacher Sara Johnson shares a great activity that combines science, nature, and celebrates the unique place we live.
Materials: Any rocks or stones you have collected, small jar with water and a paintbrush
Our family loves collecting rocks while visiting our favorite local beaches. Where we live, we often find many petoskey stones and leland blues and an assortment of beautiful fossils. Water brings out the full colors and designs of these pretty stones and it can be very soothing and therapeutic. It’s a fun activity that you can come back to again and again.


Planting an oak tree
One of the best gifts we can give the future generation is trees. Here are some simple directions for kids to plant their own oak tree from acorns.
What do you need?
Acorns from an oak tree
Bag or bucket to put them in
Containers to plant them in
Potting soil
Water


